Upgrading a motherboard isn’t too difficult. But activating Windows 10 and having it play nicely with your new motherboard is a different story. Here’s how you replace a motherboard without reinstalling Windows 10.
Can You Replace a Motherboard On Windows 10?
The problem with replacing a motherboard while using Windows 10 stems from Microsoft’s licensing. Or rather, misunderstanding how Windows 10 licenses work when you want to make a major upgrade. There are three main Windows 10 license types:
OEM: Original Equipment Manufacturer licenses come preinstalled on the hardware you purchase and are linked to the motherboard in the deviceRetail: You purchase a retail license online and can transfer the license between different computersVolume: Microsoft issues volume licenses in bulk to large organizations, such as businesses, universities, or governments, and allows a single license key to activate numerous installations
Each Windows license links to the hardware it’s first installed on, specifically, the motherboard. Only the retail license is transferable between motherboards. If you attempt to swap out the motherboard on a Windows 10 machine using an OEM or Volume license, there is a strong chance the new installation will not activate Windows 10. There are several examples, however, of Windows 10 OEM and Volume licenses activating on new hardware, including a motherboard. For more information, check out how to transfer a Windows 10 license to a new computer.
How to Check Your Windows 10 License Type
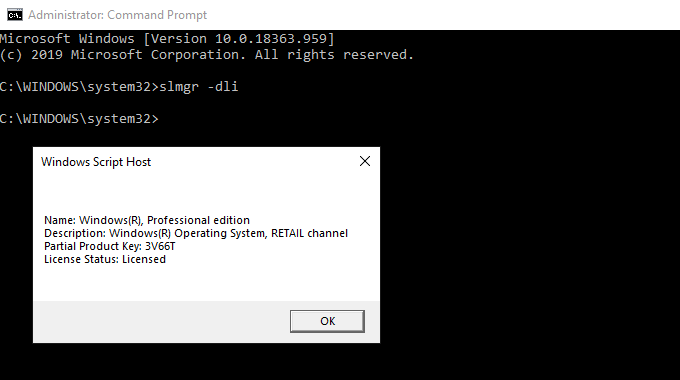
Before attempting to replace your motherboard, check the type of Windows 10 license installed on your system. Type command prompt in your Start Menu search bar, and open the Best Match. Now, input the following command: slmgr -dli Wait a brief moment for the Windows Script Host window to appear. You’ll see the Windows 10 license type alongside the Description. It will clearly state which license type you have, be that retail, OEM, or volume. If you have a retail license, you can transfer your Windows 10 installation to a new motherboard easily.
How To Replace a Motherboard Without Reinstalling Windows 10
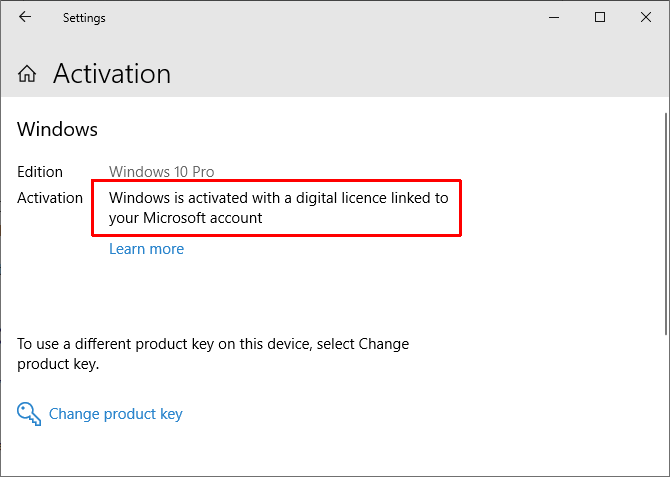
When you switch out your motherboard, you can keep the hard drive or solid-state drive with your Windows 10 installation. After replacing the motherboard, you reconnect the Windows 10 drive. All being well, Windows 10 will reconfigure itself, and you can continue using the operating system. As you might expect, it doesn’t always work out like that! For the most part, you’ll encounter issues relating to Windows 10 license activation. The best way to make sure your new motherboard doesn’t require a fresh installation is to link your Windows license and your Microsoft account before making the change. Press Windows Key + I, then head to Updates & Security > Activation. Under Add a Microsoft account, select Add an account. After this, you’ll need to sign into your Microsoft account. Once you complete the sign-in process, Microsoft will link your Windows 10 license and your Microsoft account. Linking your account allows you to sign back into Windows 10 after installing your new motherboard, without messing around with product codes or otherwise. However, you should note that only Retail licenses transfer in this manner. That said, there are numerous examples of OEM or Volume licenses also activating, so it’s worth a try.
Windows 10 License Troubleshooter
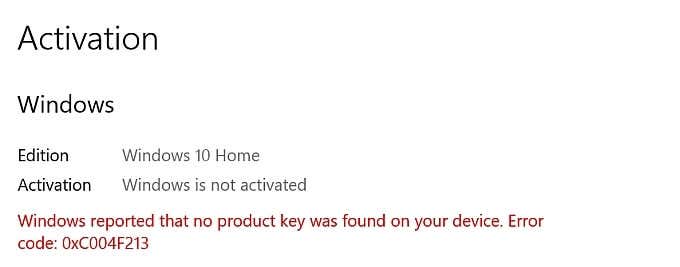
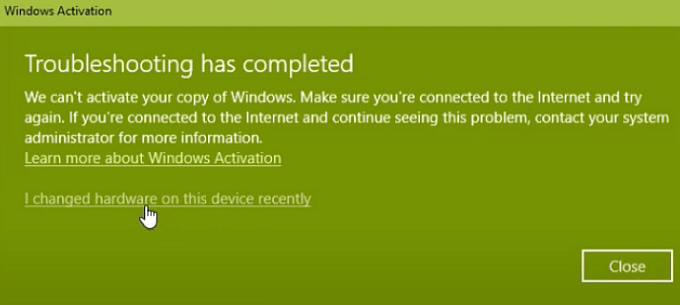
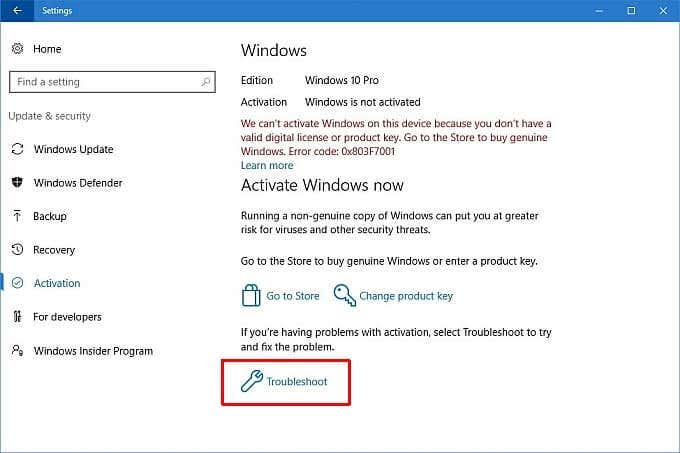
Windows 10 includes a license troubleshooter you can use to attempt to fix any post-motherboard issues. The troubleshooter should detect that you recently installed new hardware. After installing your new motherboard, press Windows Key + I, then head to Updates & Security > Activation, where you may find the Windows is not activated message. If you do see the message, head to the bottom of the page, and select Troubleshoot. Now, select I changed hardware on this device recently. Then, sign into your Microsoft account and identify the device you are using. The Microsoft activation process will whirr into life, and after a moment or two, it should activate Windows 10 with your new motherboard.
Activate With Windows 7 or Windows 8.1 Product Key
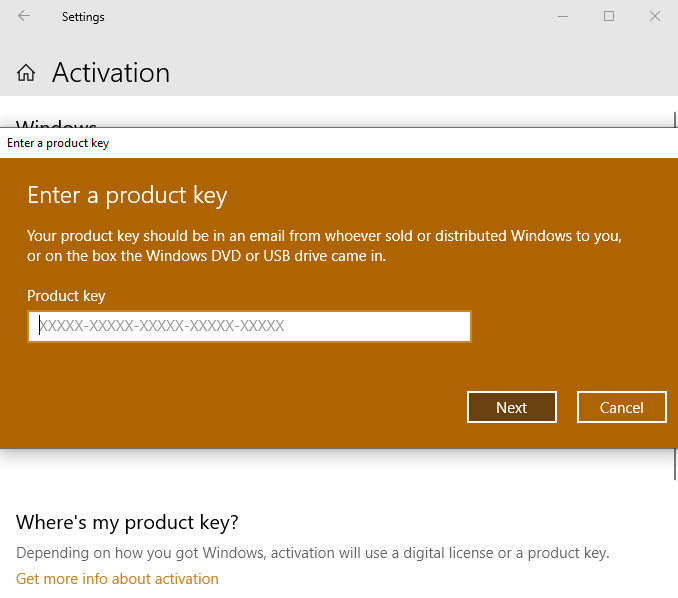
When Windows 10 was announced, Microsoft confirmed that existing Windows 7 and Windows 8/8.1 license holders would receive a free upgrade to Windows 10. The upgrade process converted licenses for the older Windows versions into digital licenses for the new operating system. That digitization of licenses and product keys left many Windows users without a specific product key for their new operating system—only the information in the Settings panel that you have a digital license. If Windows 10 will not activate after installing a new motherboard and you upgraded to Windows 10 via Windows 7 or 8/8.1, you can attempt to activate Windows 10 on the new hardware combination using your old product key. Press Windows Key + I, then head to Updates & Security > Activation. Under Update product key, select Change product key. Input the product key associated with your Windows 7 or Windows 8/8.1 license and select Next. Windows 10 should now activate. Struggling to find your old product key? Here are a few places you can check to find it!
You Don’t Have to Reinstall Windows 10!
You don’t have to reinstall Windows 10 after upgrading your motherboard if you take a few steps before making the switch. The difficulty is getting Windows 10 and your new motherboard to play nicely after you complete the upgrade. Windows 10 Retail license holders should have no trouble at all. The Retail license is a product designed for multiple installations, without issue. Windows 10 OEM and Volume license holders can attempt to upgrade their motherboard without reinstalling Windows. It definitely works on occasion—but not all of the time. Try and remember back to the Windows 10 launch. Did you upgrade from Windows 7 or Windows 8/8.1 to Windows 10? If so, you need to try using your product key from the old operating system. If you opt for a clean Windows 10 installation, make sure to check out how to create a Windows 10 installation USB stick.
